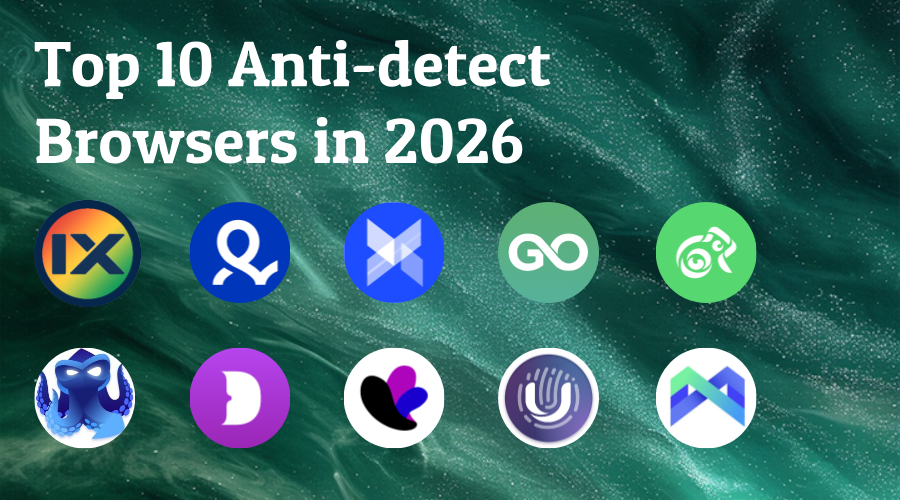
Top 10 antidetect browsers for 2026
What are antidetect browsers?
Fingerprint browsers, also known as anti-detect browsers or multi-account management browsers, are technical tools that modify browser fingerprint parameters (such as User Agent, Canvas, WebGL, fonts, timezone, hardware concurrency, etc.) to simulate different device environments. Their core purpose is to give each browser profile an independent digital fingerprint, making websites recognise different accounts as coming from completely different real users. This effectively avoids account bans caused by IP and device parameter associations in multi-account operations.
As cross-border e-commerce, social media marketing, affiliate marketing and other industries have grown rapidly, fingerprint browsers have evolved from standalone simulation tools into comprehensive SaaS platforms that integrate fingerprint spoofing, proxy management, team collaboration and automation. Most mainstream fingerprint browsers are now built on real browser engines such as Chromium and Firefox. They deeply spoof fingerprint parameters to achieve environment isolation, and can work with HTTP/SOCKS5 proxies to bind each environment to an independent IP address, further raising the level of security against association.
Below is detailed comparison information for 10 popular fingerprint browsers.
How to choose the right antidetect browser for you?
If you've started looking into antidetect browsers, you'll quickly realize they're not hard to find. In fact, there are at least ten options out there-quite a variety! Since many of them differ in price and features, it's a good idea to answer a few key questions before making a choice:
What’s my budget?
Quality comes at a cost, so the best antidetect browsers tend to be expensive. That said, some providers like GoLogin offer more profiles for less money.
How many profiles do I need?
Some antidetect browsers provide free tiers that let you create up to 10 profiles. Beyond that, the number of profiles is one of the main price drivers.
Will I be the only user?
If you're working at a marketing agency, you'll likely need to collaborate with colleagues. In that case, look for features like browser profile sync and cloud storage—they'll make teamwork much smoother.
Do I want to automate browsing tasks?
If yes, consider an antidetect browser that supports API integration with headless libraries. The industry standard remains Selenium, but you'll also find support for Puppeteer and Playwright. Some browsers may even allow you to record actions or use pre-built automation commands based on natural-language LLM prompts.
Top 10 antidetect browsers for 2026
ixBrowser
ixBrowser is an antidetect browser that claims to be “permanently free”. The official promise is to provide unlimited browser windows and unlimited team member seats for free. Users can create 10 new profiles per day, and open profiles up to 100 times per day – which covers the daily needs of most users. ixBrowser supports all Chrome Web Store extensions and allows users to upload custom plugins to extend functionality.
Core advantages:
1.Permanent free is its most outstanding selling point – free version already offers unlimited total profiles and seamless team collaboration.
2.High fingerprint pass rate, passing third‑party tests like Pixelscan.
3.Built-in fingerprint and IP double isolation.
4.Extremely low paid professional plan ($3.99/month) – excellent value.
Multilogin
Multilogin is a veteran benchmark in the anti‑detect browser field, founded in 2015, and has played a key role in defining industry security standards. It supports dual browser engines, built-in advanced fingerprint control and premium proxy resources, tailored for enterprise-level users and teams managing large numbers of accounts. At the end of 2025, Multilogin underwent a major upgrade, evolving from a traditional anti-detect browser into a comprehensive account management platform integrating mobile cloud phones, browser profiles and automation features, introducing “Mobile profiles” and “Browser profiles” dual modes.
Core advantages:
1.Recognised as having the highest security standards; the top choice for cross‑border e-commerce and other highly security-sensitive industries.
2.Most complete API documentation and enterprise-grade features.
3.Built-in residential proxy resources covering 5+ million IPs across 195+ countries.
4.Supports sticky IP sessions up to 24 hours.
5.Supports HTTP(S), SOCKS5 and other proxy protocols.
6.Rated by oxylabs.io as the “Best Antidetect Browser for Large-Scale Multi-Account Management in 2026”.
AdsPower
AdsPower is one of the most influential fingerprint browsers in the Chinese cross-border e-commerce space, with 9+ million users across 235+ countries and regions. It offers a dual-engine solution: SunBrowser based on Chromium and FlowerBrowser based on Firefox, allowing users to freely choose on the same platform to adapt to different platforms’ detection algorithms. Supports creation of over 20 customisable fingerprint parameters, with complete isolation of IP and fingerprint data between profiles. AdsPower integrates powerful RPA robots, window synchronisation and API features, plus a template store to improve efficiency in bulk multi-account automation.
Core advantages:
1.High cost-performance ratio, with a permanent free version and flexible pricing starting low.
2.Chrome and Firefox dual-engine anti-detection support.
3.Mature RPA robot template store and window synchronisation.
4.Strong data security (login warnings, abnormal interception, two-factor authentication).
GoLogin
GoLogin is an anti-detect browser focused on cost-effectiveness. It automatically configures 53 fingerprint parameters including device, software, geolocation details to ensure each account appears unique to websites. Positioned as an economical alternative for individual users and small to medium teams, with annual plans often at 50% discount.
Core advantages:
1.Affordable pricing, up to 50% discount on annual plans.
2.Built-in free proxy (for paid users).
3.Residential and mobile proxies in 100+ countries, no additional configuration needed.
4.Full Selenium, Puppeteer, Playwright automation integration.
5.API request rate up to 1200 per minute.
6.Android mobile app.
Kameleo
Kameleo is a fingerprint simulation software deeply oriented toward developers and technical users, known for its multi-engine support, high fingerprint customisation and mobile simulation capabilities. It supports fingerprint simulation based on real browser engines (Chromium/Edge/Firefox), and developers can seamlessly integrate Kameleo into Playwright, Puppeteer or Selenium automation frameworks via SDK. Kameleo is ideal for teams needing anti-scraping, headless browser automation and fine-grained fingerprint control.
Core advantages:
1.Industry-leading deep fingerprint customisation.
2.Exclusive support for mobile and Android browser environment simulation.
3.Developer-friendly with complete local API and Docker ready deployment.
4.Regularly publishes Live Transparency Report showing compatibility test results of its anti-detection system.
Octo Browser
Octo Browser is an anti-detect browser focused on deep fingerprint spoofing technology. It simulates over 50 parameters (UserAgent, OS, screen, CPU cores, WebGL, WebRTC, geolocation, etc.) to generate a unique digital fingerprint for each profile. Even when running hundreds of profiles concurrently, Octo Browser maintains high performance, suitable for professional‑grade social media management and cross-border e-commerce multi-account scenarios.
Core advantages:
1.Independently developed fingerprint obfuscation technology, spoofing 50+ parameters – ahead of many competitors at similar prices.
2.Stable performance under heavy concurrent profiles.
3.Built-in proxy shop for purchasing residential proxies directly within the browser.
4.API support for Puppeteer, Selenium and CDP libraries.
Dolphin Anty
Dolphin Anty (stylised as Dolphin {anty}) is an anti-detect browser originating from Russia, launched in 2021. It quickly gained recognition in affiliate marketing and traffic arbitrage communities, and was specifically built by professional paid-traffic digital marketing teams for managing multiple Facebook ad accounts. It now has over 860,000 individual users and 2,200+ team users, with an intuitive and smooth interface, often called the “cool new star of anti-detect browsers”.
Core advantages:
1.Clean and easy-to-use interface, focused on fast, manual account management.
2.One-click batch update of multiple profiles’ fingerprints.
3.Flexible control of over 20 fingerprint parameters including WebGL, WebGPU, device name.
4.First to introduce automatic browser profile synchronisation.
5.Well-developed team collaboration features with fine-grained folder-level permission management.
Incogniton
Incogniton is a mid-to-low priced anti-detect browser from the Netherlands, famous for its most generous free plan, popular among individual users and developers. Incogniton supports browser automation via Selenium/REST API, and its built‑in synchroniser lets team members easily share the same profile’s cookies and browsing state. Its free plan includes Selenium integration, making it one of the best free options for developers.
Core advantages:
1.Most generous free plan on the market (10 profiles for the first 2 months, then permanently 3 profiles).
2.Comprehensive features covering bulk creation, synchroniser, cookie management and team collaboration.
3.Pre-integrated support with proxy providers like HypeProxies, QuarkIP, Swiftproxy, 9Proxy.
Undetectable
Undetectable is a professional anti‑detect browser officially launched in August 2020. It modifies over 100 fingerprint parameters (including all major operating systems, browsers, WebGL, geolocation, fonts, etc.) to protect user online privacy. It offers unlimited local profiles, a Cookies Bot that automatically visits popular websites to warm up profiles based on target geography, and supports team collaboration, role‑based permissions and API automation.
Core advantages:
1.Unlimited local profiles, 100+ fingerprint parameters customisable.
2.Built-in Cookies Bot to auto-generate cookies and warm up environments on e-commerce or social media sites, improving account survival rates.
3.Window synchroniser for simultaneous actions across multiple profiles.
4.Integrated major proxy providers, one-click configuration of third-party proxies.
MoreLogin
MoreLogin is a dual-engine fingerprint browser offering permanent free profiles. In addition to browser simulation, it includes a complete Android cloud phone OS, achieving a “browser + mobile” combined environment isolation. MoreLogin introduces the concept of “dual environment” (browser profiles + cloud phone profiles), making it one of the few browsers that fully simulate Android systems. For TikTok, Instagram operators who need to manage mobile app identities, MoreLogin provides a “cost-saving and lightweight” alternative.
Core advantages:
1.Dual-engine architecture (browser environment + cloud phone environment) covering both Web and Android mobile account management.
2.Free version includes 2 permanently free browser profiles + 100 free minutes of cloud phone usage.
3.AES-256 end-to-end encrypted sync–users hold the encryption key, server cannot access data.
4.Supports RPA, API, Zapier/Make integration for automation.
Read More