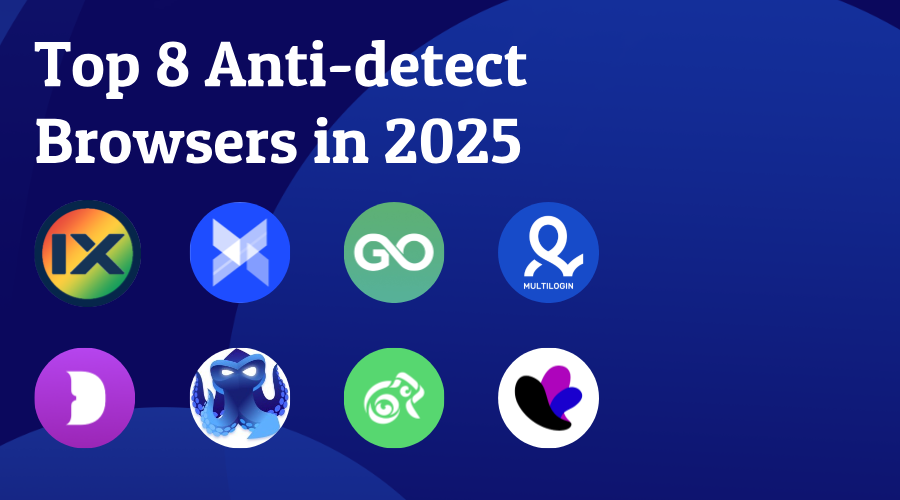
Top 8 Anti-detect Browsers in 2025
As our digital footprints flow through the global network at a speed of TB per second, browser fingerprints have quietly become the "digital DNA" of the Internet era. As the detection mechanisms of various websites continue to be upgraded and strengthened, anti-detect browsers have become a survival necessity for digital natives. They are not only a powerful tool for e-commerce practitioners to break through the account bans of the platform, but also a safe haven for citizens of the Metaverse to defend their virtual assets.
In this article, we will introduce the TOP10 best fingerprint browsers in 2025, hoping to give you some helps.
What is antidetect browser?
An anti-detect browser is an application developed based on a popular web browsers’ kernels, usually Chrome or Firefox. Anti-detect browsers can help you create countless independent profile environments and generate unique digital fingerprints for each profile. Therefore, when the websites try to detect your device, these profiles cannot be associated with each other through digital fingerprints. The use scenarios of anti-detect browsers are very wide. Whether you need to build a social media account matrix, create multiple seller accounts on an e-commerce platform, or receive remote tasks through different accounts, anti-detect browsers are your best partner.
How to choose the one that meet your demand?
There are many fingerprint browser brands on the market, and they have different functions, but how to choose a suitable browser? You may need to make your own judgment on the following points:
How is its fingerprint technology? Digital fingerprint is the top priority for anti-detect browsers. Good fingerprint technology can not only help you escape detection by platforms and web pages, but also ensure that the profile where each of your accounts is located is unique and independent.
How many profiles you want to create? Many browsers offer free packages or trial packages, but usually these packages do not allow you to create many profiles, which may not meet your usage needs. Therefore, you need to understand the specific number of profiles you need.
Do you need to work with others? The number of team seats is also an important indicator for browsers to distinguish between different packages. If you are an individual user, the free version or some basic versions may be able to meet your needs. But if you need to use it with your team members or colleagues, you also need to consider whether the team seats provided by the browser meet your needs.
How much is your budget? You need to consider not only the price of the package, but also the price of the proxy if you need to use one. At the same time, everyone wants to spend less money to achieve great things, so you also need to consider many factors such as the richness of the browser's functions, fingerprint quality, etc. to determine which browser is the most suitable for you within your budget.
Do you need browser automation? If you do, you need to first consider browsers with API capabilities and find out if they support Selenium, Puppeteer or even Pyppeteer.
The Best Antidetect Browsers for 2025
1.ixBrowser
ixBrowser is a free anti-detection browser focused on multi-account management, leveraging digital fingerprint isolation technology to enable secure and efficient handling of multiple independent accounts. Its core features include unlimited browser profile creation, customizable fingerprint parameters (e.g., UserAgent, time zone, WebRTC), team collaboration tools, and proxy server integration, addressing scenarios from social media marketing to cross-border e-commerce and traffic arbitrage. By mimicking real user behavior and generating unique digital fingerprints, ixBrowser effectively bypasses platform detection (e.g., reCAPTCHA, IP blocks) and supports Chrome extensions for flexible operational needs
Its technical strengths lie in zero-cost entry and high scalability. The free version of ixBrowser allows 10 daily profile creations and 100 daily profile launches, while paid plans (from $3.99/month) unlock higher quotas and API automation. Through its integrated proxy and fingerprint noise techniques (e.g., Canvas masking, WebGL distortion), ixBrowser achieves dual isolation of IP and fingerprints, with a 95%+ pass rate on third-party detection tools. Additionally, its team collaboration feature supports multiple members, enabling role-based access control and profile sharing to enhance multi-account operational efficiency.
ixBrowser is ideal for cross-border e-commerce store management, social media matrix operations, and ad campaign testing, offering cloud data storage and one-click proxy configuration to ensure account security and anonymity. With a user-friendly interface supporting multiple languages and dark mode. Users can validate needs through a free pack, while enterprise clients opt for customized plans to handle large-scale concurrent tasks.
Website: https://www.ixbrowser.com/
Operating systems: Windows, macOS (Under planning)
Free Plan: Yes
Proxy: Integrated dynamic and static proxy in client
Price: From $3.99/month for 100 profile creation times per day
Trial: No
2.Adspower
AdsPower is a leading anti-detect fingerprint browser designed to empower businesses and individuals in securely managing multiple online accounts while mitigating platform detection risks. Specializing in cross-border e-commerce, social media marketing, and multi-account operations, AdsPower provides isolated browser environments with unique digital fingerprints to prevent account association. Its core features include customizable browser profiles, Chrome & Firefox dual-kernel support, RPA automation, and real-time window synchronization, enabling users to operate accounts on platforms like Amazon, TikTok, and Facebook without triggering bans.
The platform’s technical edge lies in its advanced fingerprint simulation and automation capabilities. AdsPower modifies over 20 browser parameters (e.g., User-Agent, Canvas, WebGL, IP) to mimic real-device fingerprints, achieving a 95%+ pass rate on third-party detection tools. Integrated with proxy compatibility (HTTP/Socks5) and no-code RPA robots, it automates repetitive tasks like bulk logins and ad campaigns, significantly reducing manual effort. Additionally, its team collaboration tools—role-based permissions, cloud storage, and activity logs—streamline multi-user workflows while ensuring GDPR-compliant data encryption and local storage.
Trusted by 5 million+ global users, AdsPower offers flexible pricing with a free tier (5 browser profiles) and affordable paid plans (from $9/month). Praised for its user-friendly interface, multi-language support, and responsive customer service, it stands out as a cost-effective alternative to competitors like Multilogin and Dolphin Anty. Whether for ad testing, social media management, or secure data scraping, AdsPower delivers a scalable, privacy-first solution for modern digital operations.
Website: https://www.adspower.net/
Operating systems: Windows, macOS, Linux
Free Plan: 5 browser profiles
Price: From $5.40/month for 10 profiles
Trial: No
3.Gologin
GoLogin is an anti-detect fingerprint browser designed to securely manage multiple online accounts by isolating digital fingerprints. Its core features include unlimited browser profile creation, automated fingerprint configuration (e.g., UserAgent, time zone, Canvas fingerprint), team collaboration tools, and built-in proxy integration, ideal for cross-border e-commerce, social media management, and ad testing. By mimicking real-user behavior and generating unique fingerprints, GoLogin bypasses platform detection (e.g., reCAPTCHA, IP blocks) and supports Chrome extensions with cloud-based synchronization for seamless cross-device operations.
Its technical strengths lie in cost efficiency and user-friendliness. GoLogin enables one-click profile creation with 53+ automated fingerprint parameters, achieving a 95%+ pass rate on third-party detection tools. It runs 12x faster than traditional virtual machines while reducing costs by 84%. Built-in proxies span 195+ countries, covering residential, mobile, and datacenter IPs with encrypted traffic. The platform offers a free tier (3 profiles) and flexible paid plans (from $24/month), all including 2GB proxy traffic, catering to both individual and enterprise needs.
GoLogin is ideal for multi-store e-commerce management, social media account matrices, and data scraping, offering cloud storage and role-based team collaboration. With an intuitive interface supporting multiple languages and dark mode, it ensures GDPR compliance through AWS encryption. Users can explore features via a 7-day free trial, while enterprises opt for customized plans with 24/7 support to handle large-scale tasks.
Website: https://gologin.com/
Operating systems: Windows, macOS, Linux, Android
Free Plan: 3 browser profiles
Price: From $49/month for 100 profiles
Trial: 7 days
4.Multilogin
Multilogin is a premium anti-detect browser designed for securely managing multiple online identities with enterprise-grade solutions. Its core features include natural device fingerprint emulation (covering hardware, software, and network parameters), dual browser engines (Chromium-based Mimic and Firefox-based Stealthfox), and automation tools (e.g., Selenium, Puppeteer, Playwright), ideal for cross-border e-commerce, social media operations, and ad testing. Leveraging dynamic fingerprint isolation and proxy integration (HTTP/SOCKS5 and built-in residential proxies), Multilogin bypasses platform detection (e.g., reCAPTCHA, IP blocks) and supports local/cloud profile storage for seamless collaboration.
Its technical strengths lie in high anonymity and scalable automation. Multilogin X (latest version) emulates 20+ browser parameters (e.g., UserAgent, Canvas, WebGL), achieving a 95%+ pass rate on third-party detection tools and excelling in Pixelscan and CreepJS tests. Its API-first approach enables end-to-end automation (e.g., batch profile creation, cookie management), while built-in AI quick actions streamline complex tasks. The platform also offers team collaboration with multi-workspace management and four customizable roles for enterprise-level security.
Targeting the premium market, Multilogin starts at €99/month (no free trial) with three plans (100/300/1000 profiles), offering multi-language support (including Chinese) and 24/7 customer service. Its strict compliance (GDPR-compliant encryption, prohibited illegal use) and frequent updates (monthly core upgrades) reinforce its leadership in the anti-detect sector.
Website: https://multilogin.com/
Operating systems: Windows, macOS, Linux
Free Plan: No
Price: From $29/month for 10 profiles
Trial: Contact support
5.Dolphin Anty
Dolphin Anty is a high-performance anti-detect browser tailored for affiliate marketing, social media management, and cryptocurrency trading. Its core features include realistic browser fingerprint generation (covering 20+ parameters like hardware, OS, WebGL), dynamic proxy integration (HTTP/SOCKS5 and mobile proxies), and no-code automation scripts, enabling bulk management of hundreds of accounts while bypassing platform detection (e.g., Facebook, TikTok anti-fraud systems). By isolating cookies and caches, each account maintains a unique digital identity, with team collaboration tools and a Synchronizer for automated cross-profile operations.
Its technical strengths lie in high anonymity and automation efficiency. Dolphin Anty uses kernel-level fingerprint replacement (not JavaScript-based) and AI-driven behavior simulation (e.g., Smart Paste, mouse movement mimicry), achieving a 95%+ pass rate on third-party detection tools (e.g., Pixelscan, CreepJS). It supports batch profile imports (via Excel templates) and one-click random fingerprint generation, reducing resource consumption by 80% compared to traditional VMs. Additionally, its proxy manager automatically filters invalid IPs and integrates with residential proxy services like iProxy for global IP coverage.
Website: https://dolphin-anty.com/
Operating systems: Windows, macOS, Linux
Free Plan: 10 browser profiles
Price: From $10/month for 60 profiles
Trial: Contact support
6.Octo Browser
Octo Browser is a high-performance anti-detect browser tailored for affiliate marketing, e-commerce, cryptocurrency trading, and privacy protection. Its core features include realistic device fingerprint emulation (covering 50+ parameters like OS, browser version, Canvas), dynamic proxy integration (HTTP/SOCKS5), and no-code API automation, enabling bulk management of hundreds of accounts while bypassing platform detection (e.g., Facebook, TikTok anti-fraud systems). By isolating cookies and caches, each account maintains a unique digital identity, with team collaboration tools, tag-based organization, and cloud profile templates for diverse user needs.
Its technical strengths lie in highly customizable fingerprints and automation efficiency. Built on Chromium, Octo Browser uses real-system fingerprint collection and AI-driven parameter adjustments to achieve a 95%+ pass rate on third-party detection tools. Its API supports Ruby, Python, PHP, and Go for automated profile management, while the Cookie Robot enhances authenticity by collecting and validating data. The proxy manager allows temporary and session-based proxy allocation, coupled with a Recycle Bin for profile recovery, streamlining workflows.
Octo Browser is ideal for multi-store e-commerce management, ad campaign testing, and secure browsing, offering flexible pricing (from €29/month) with long-term discounts. Enterprise features include role-based team permissions, activity logs, and 2FA, ensuring GDPR compliance through AES encryption. Despite lacking mobile support, its desktop versions (Windows/macOS/Linux Beta) boast 99.995% uptime and rapid kernel updates, making it a top choice in Russian-speaking markets.
Website: https://octobrowser.net/
Operating systems: Windows, macOS, Linux (Beta)
Free Plan: No
Price: From $29/month with 10 profiles
Trial: Contact support
7.Kameleo
Kameleo is an anti-detect browser specializing in dynamic digital fingerprint management, designed for cross-border e-commerce, social media operations, and anonymous browsing. Its core features include real-time browser fingerprint generation (100+ parameters like OS, screen resolution, WebGL), multi-engine browser emulation (Chromium, Firefox, Safari), and automation tools (e.g., Selenium, Playwright) to bypass anti-bot systems like Google reCAPTCHA and Cloudflare. With dynamic IP proxy integration (residential/mobile/datacenter proxies) and fingerprint randomization, each browser profile operates in isolation to prevent tracking and association.
Its technical strengths lie in fingerprint authenticity and cross-platform compatibility. Kameleo generates unique browser IDs via physical device fingerprint collection (non-emulated), achieving a 98% pass rate on third-party detection tools. It supports Windows, macOS, Android, and iOS, with a built-in Traffic Forwarder to route any app's traffic through proxies for mobile multi-account management. The enterprise-grade API enables bulk profile operations, coupled with team permissions and audit logs to comply with GDPR and CCPA.
Kameleo is ideal for ad verification, account matrix management, and data scraping, offering flexible plans (Personal from $49/month, Enterprise custom pricing). The free tier includes 3 profiles and basic automation, while premium plans feature unlimited storage and 24/7 support. Users securely store profiles locally or in the cloud, and the Fingerprint Cloning tool replicates real-device environments to minimize anti-detection costs.
Website: https://kameleo.io/
Operating systems: Windows, macOS, Linux
Free Plan: No
Price: From $59/month with unlimited profiles
Trial: 7 days
8.Incognition
Incogniton is an anti-detect browser designed for securely managing multiple online accounts by isolating digital fingerprints. Its core features include unlimited browser profile creation, automated fingerprint configuration (e.g., UserAgent, time zone, Canvas fingerprint), team collaboration tools, and proxy integration, ideal for cross-border e-commerce, social media management, and ad testing. By mimicking real-user behavior and generating unique fingerprints, Incogniton bypasses platform detection (e.g., reCAPTCHA, IP blocks) and supports automation with Selenium/Puppeteer to enhance operational efficiency.
Its technical strengths lie in high anonymity and automation efficiency. Incogniton enables batch profile creation with 50+ automated fingerprint parameters, achieving a 95%+ pass rate on third-party detection tools. Dynamic proxy integration (HTTP/SOCKS5) and encrypted traffic routing allow users to assign global residential/mobile IPs with one click, ensuring data privacy. The platform also offers team collaboration with role-based permissions and GDPR-compliant audit logs, while cloud sync enables cross-device profile management.
Website: https://incogniton.com/
Operating systems: Windows, macOS
Free Plan: 10 browser profiles
Price: From $29.99/month with 50 profiles
Trial: No
Read More