How to set up Datalmpulse with ixBrowser
What is DataImpulse?
DataImpulse is a well-rounded proxy provider offering residential, mobile, and data center (DC) proxies. With its diverse IP pool, it caters to a variety of use cases, from web scraping and SEO monitoring to brand protection and ad verification.
Residential proxies from DataImpulse are highly reliable and offer IPs from real user devices, ensuring anonymity and minimizing the chance of being blocked by websites. For users needing mobile proxies, DataImpulse provides access to a vast pool of mobile IPs from different carriers, perfect for tasks like social media management, app testing, and mobile traffic analysis. Additionally, their DC proxies offer high speed and scalability, ideal for large-scale data scraping or tasks requiring fast performance.
What sets DataImpulse apart is its user-centric approach, with no expiration on purchased traffic and 24/7 live support. The company also focuses on ethical sourcing of proxies, ensuring compliance and reliability. Their flexible pricing models and customizable plans make them an excellent choice for developers and businesses with unique data needs. Whether you need residential, mobile, or DC proxies, DataImpulse provides a reliable and cost-effective solution.
In summary, DataImpulse combines performance, flexibility, and customer-centric service, making it a top choice in the proxy industry. If you want to know more details about DataImpulse services, please click here.
How to setup DataImpulse with ixBrowser?
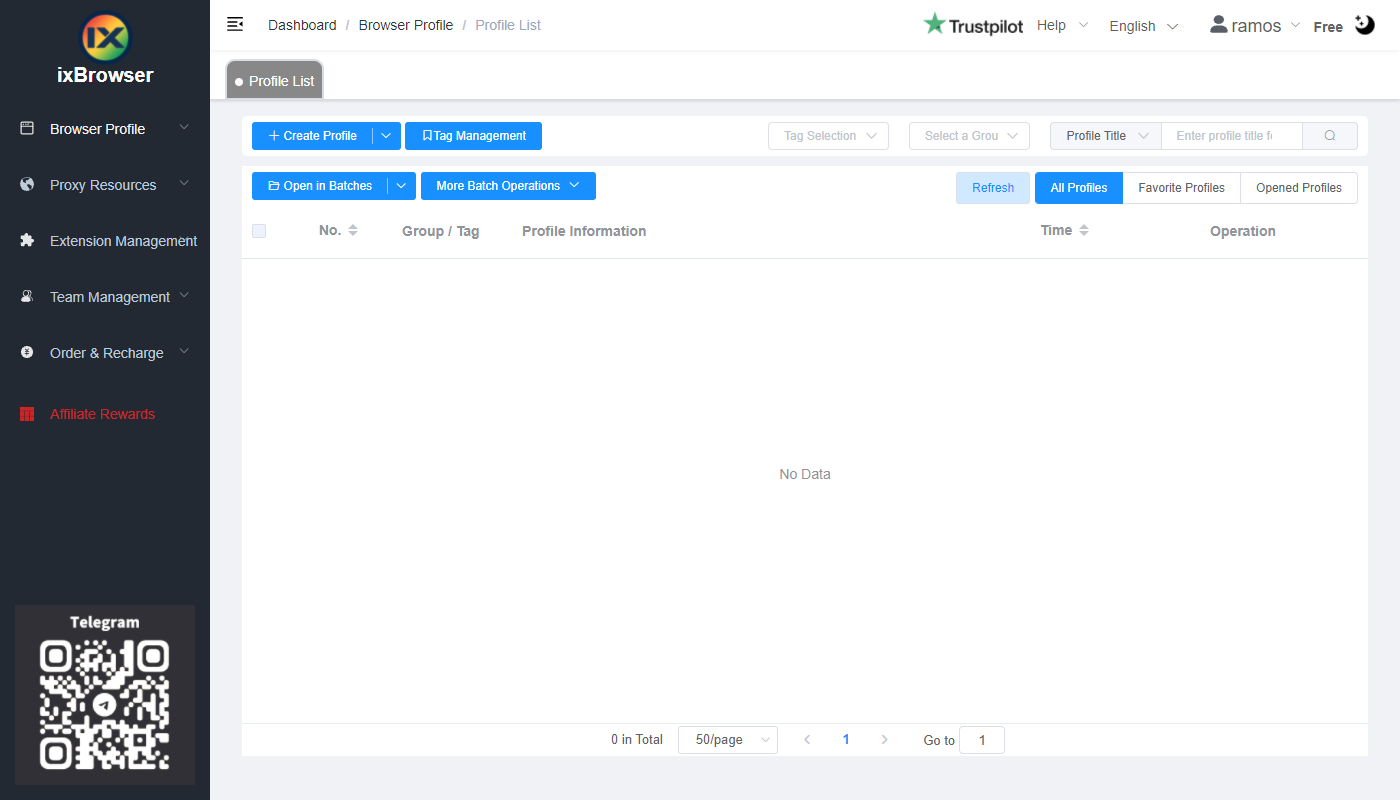
Step 1: register an account, download and log in to ixBrowser;
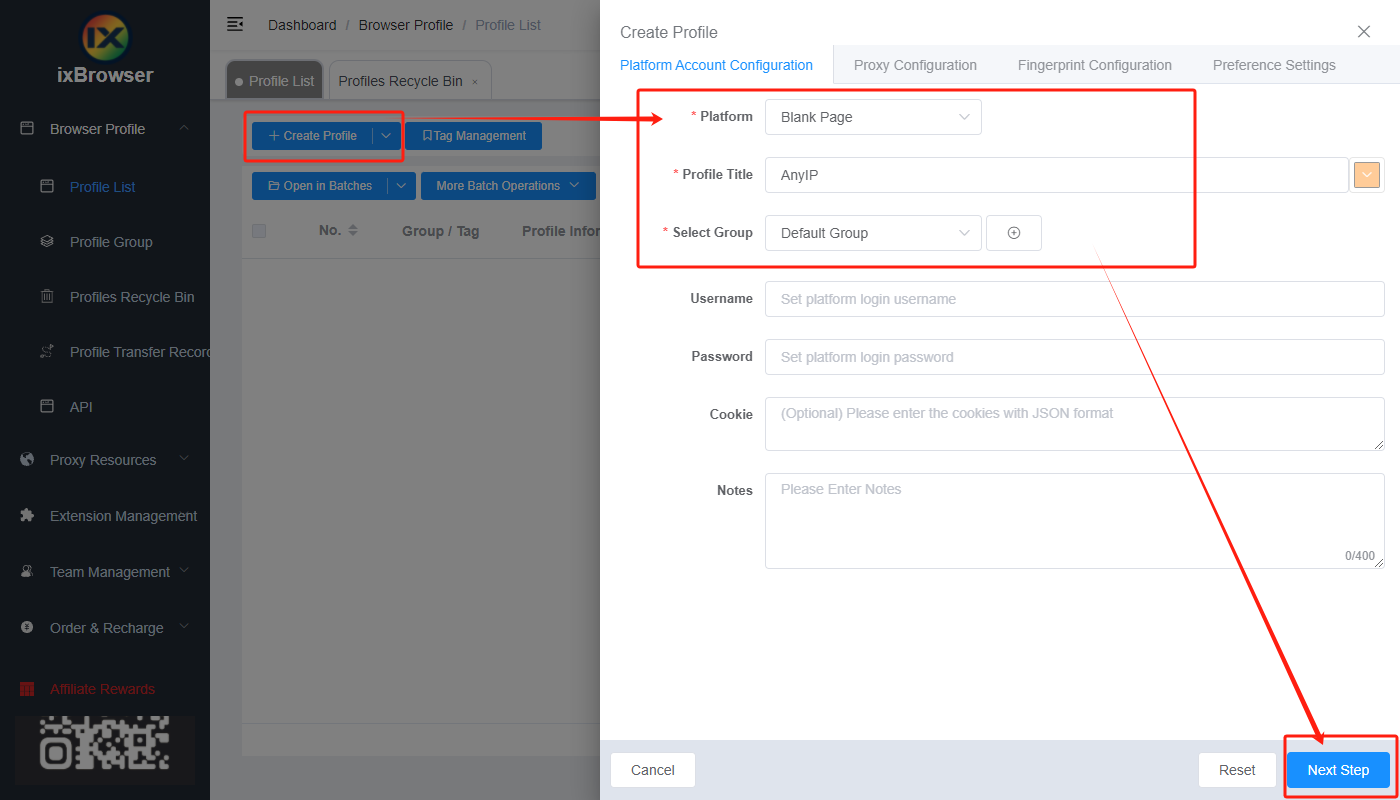
Step 2: click “Create Profile”, select platform and group, enter profile title, and click “Next Step”;
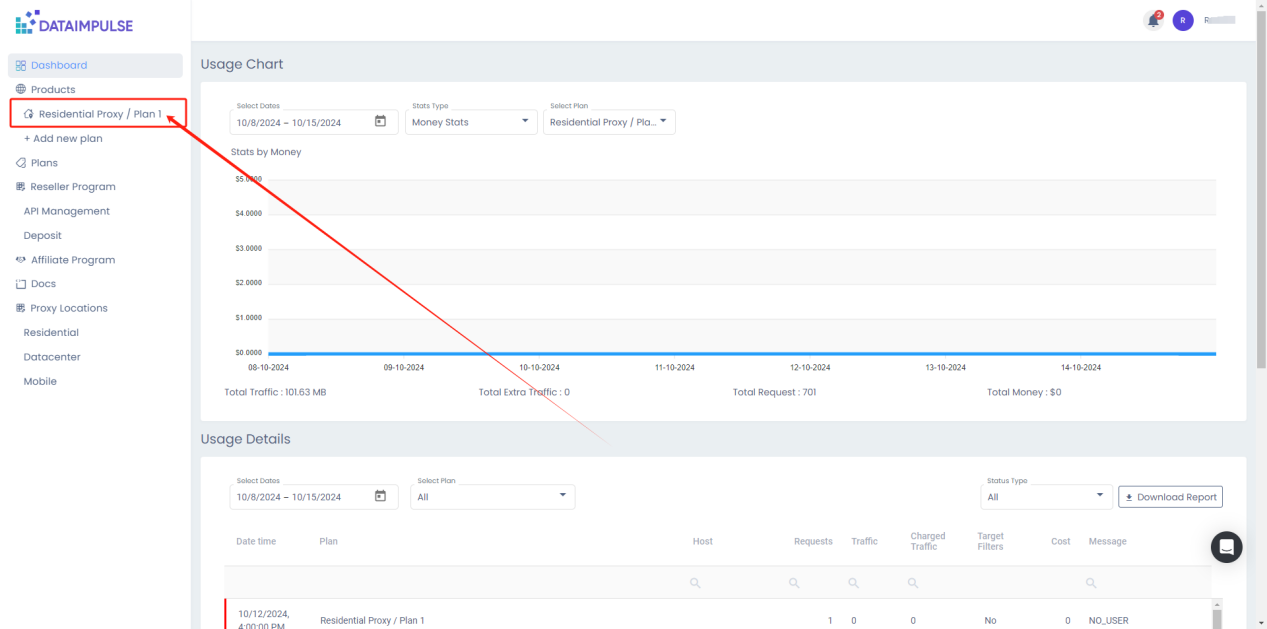
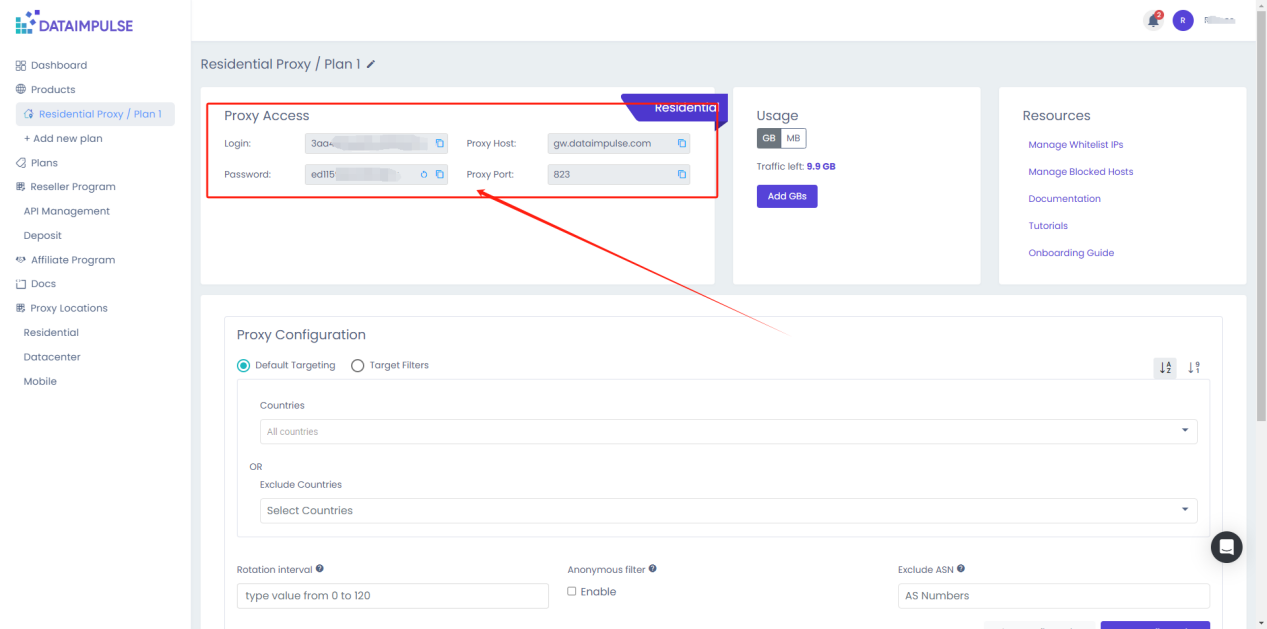
Step 3: before we configure the proxy, we need to first go to DataImpulse dashboard to get proxy info;
In the dashboard, if you have the plan already, click your plan under Products;
Then, configure the proxy settings you want;
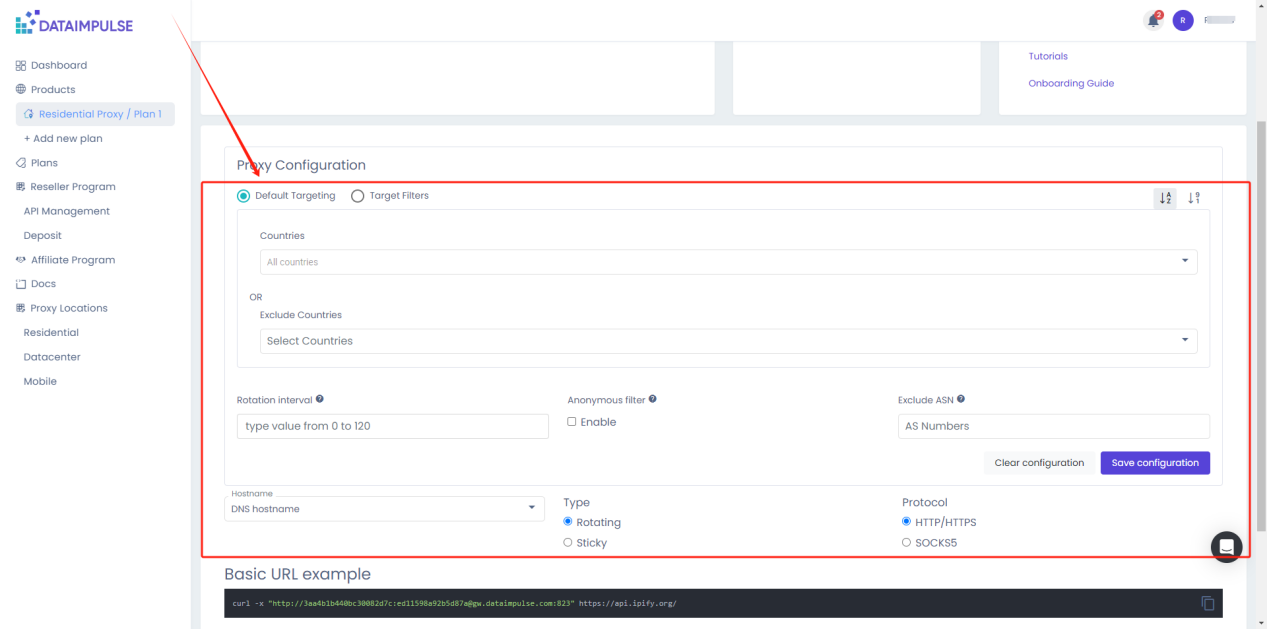
Copy the proxy information;
Step 4: now, go back to ixBrowser, in Proxy Configuration page, choose the proxy method to “Custom”, and choose proxy type to Socks5
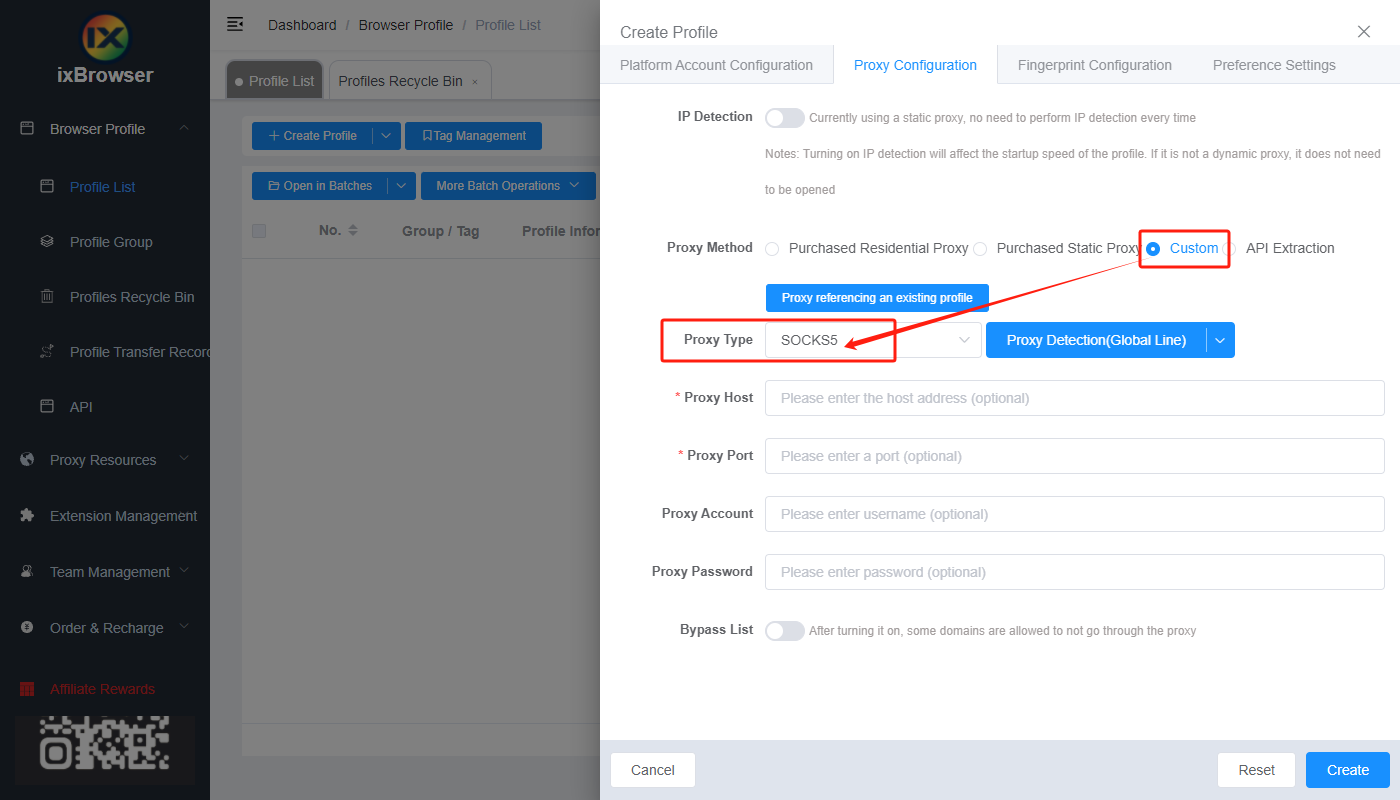
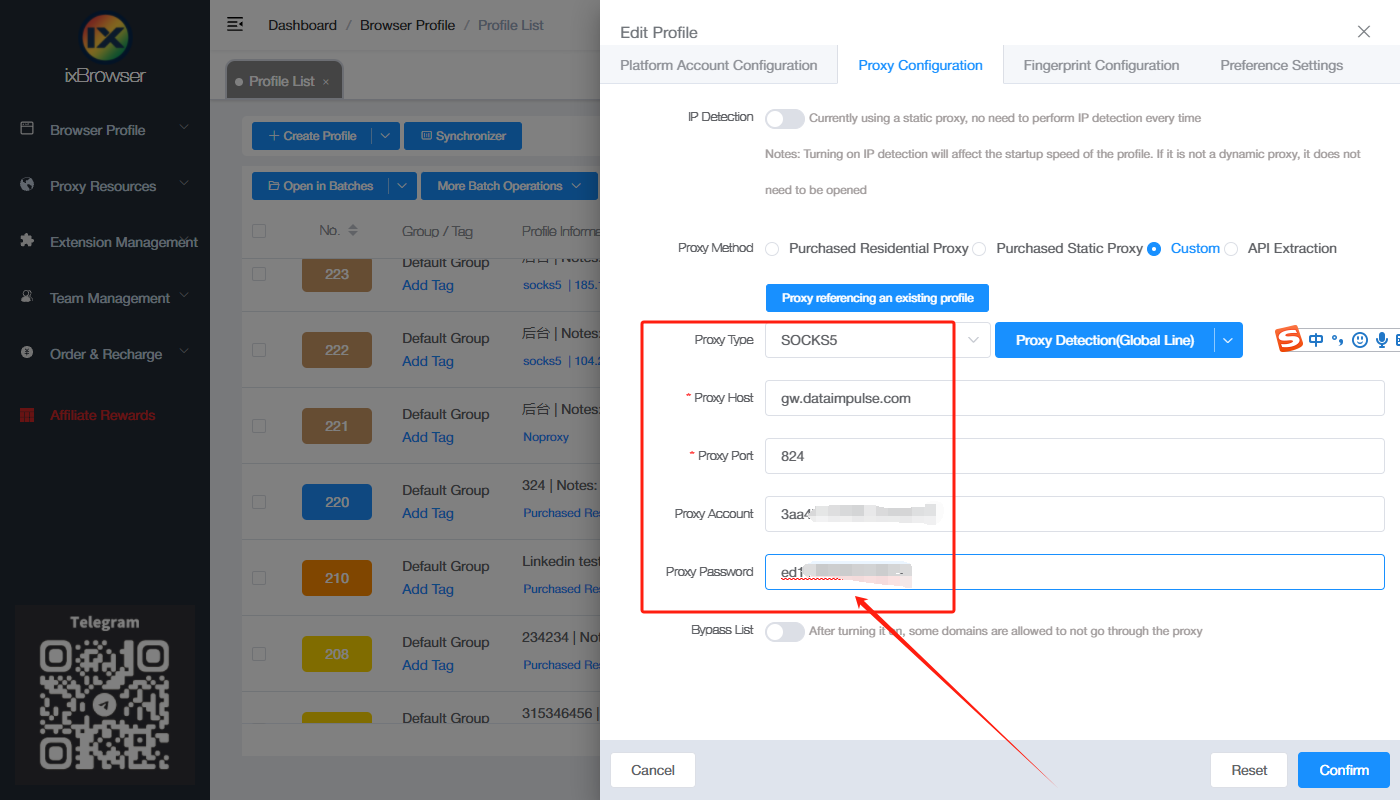
Copy the proxy credentials from DataImpulse, and paste it into ixBrowser;
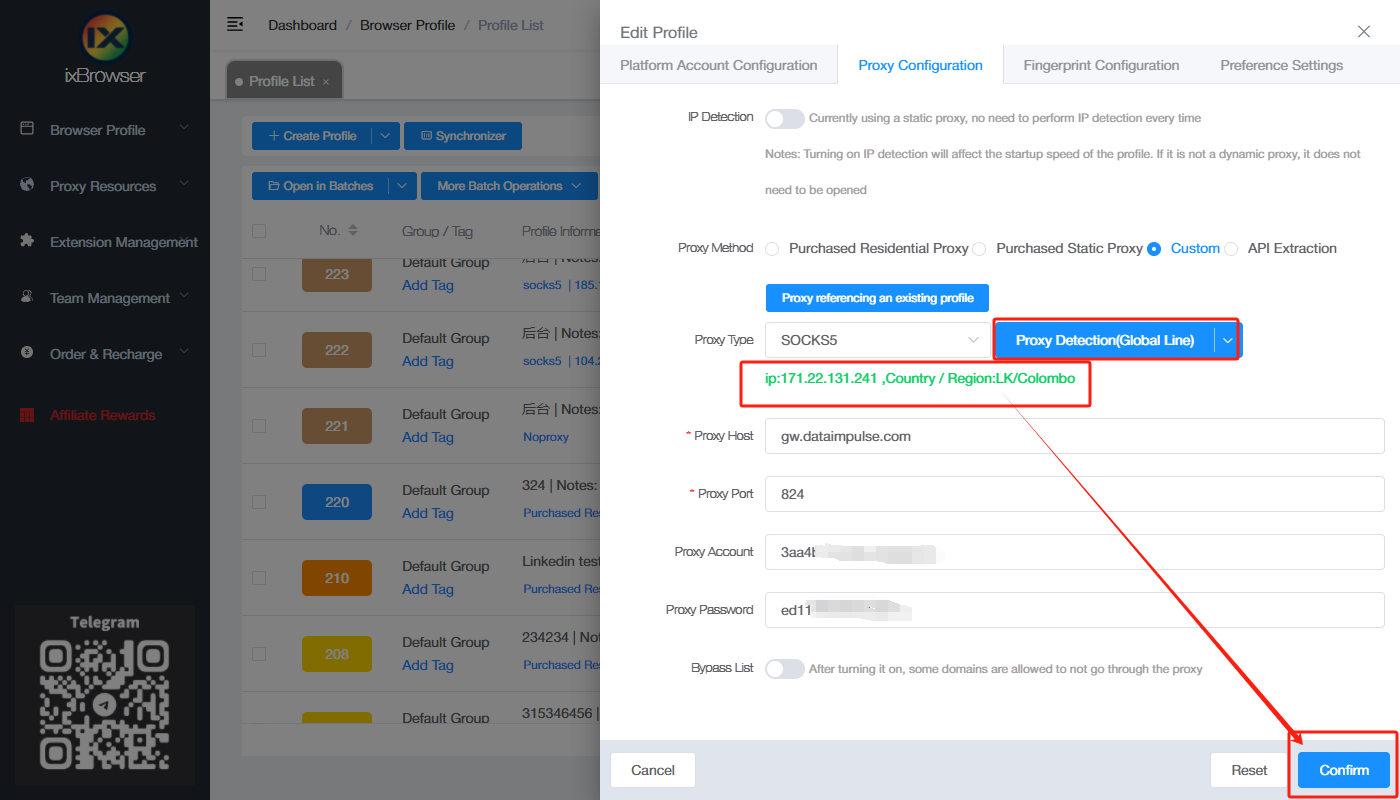
Click proxy detection, once is passed, you can click “Create” button to finish the profile creation (if you want to modify the fingerprint, you can go to Fingerprint Configuration page and make modification);
Step 5: in proxy list, find the profile you just created, click “Open” button, and you can start using it!
DataImpulse is a well-rounded proxy provider offering residential, mobile, and data center (DC) proxies. With its diverse IP pool, it caters to a variety of use cases, from web scraping and SEO monitoring to brand protection and ad verification.
Residential proxies from DataImpulse are highly reliable and offer IPs from real user devices, ensuring anonymity and minimizing the chance of being blocked by websites. For users needing mobile proxies, DataImpulse provides access to a vast pool of mobile IPs from different carriers, perfect for tasks like social media management, app testing, and mobile traffic analysis. Additionally, their DC proxies offer high speed and scalability, ideal for large-scale data scraping or tasks requiring fast performance.
What sets DataImpulse apart is its user-centric approach, with no expiration on purchased traffic and 24/7 live support. The company also focuses on ethical sourcing of proxies, ensuring compliance and reliability. Their flexible pricing models and customizable plans make them an excellent choice for developers and businesses with unique data needs. Whether you need residential, mobile, or DC proxies, DataImpulse provides a reliable and cost-effective solution.
In summary, DataImpulse combines performance, flexibility, and customer-centric service, making it a top choice in the proxy industry. If you want to know more details about DataImpulse services, please click here.
How to setup DataImpulse with ixBrowser?
Step 1: register an account, download and log in to ixBrowser;
Step 2: click “Create Profile”, select platform and group, enter profile title, and click “Next Step”;
Step 3: before we configure the proxy, we need to first go to DataImpulse dashboard to get proxy info;
In the dashboard, if you have the plan already, click your plan under Products;
Then, configure the proxy settings you want;
Copy the proxy information;
Step 4: now, go back to ixBrowser, in Proxy Configuration page, choose the proxy method to “Custom”, and choose proxy type to Socks5
Copy the proxy credentials from DataImpulse, and paste it into ixBrowser;
Click proxy detection, once is passed, you can click “Create” button to finish the profile creation (if you want to modify the fingerprint, you can go to Fingerprint Configuration page and make modification);
Step 5: in proxy list, find the profile you just created, click “Open” button, and you can start using it!