How to set up Proxidize with ixBrowser
Proxidize is happy to announce a partnership with ixBrowser, a free antidetect browser. They offer multiple account management, fingerprint security, and an effective ecosystem for teamwork. ixBrowser offers immersive and detailed documentation that gives users everything they need to know about how to effectively use an antidetect browser, along with simple and straightforward proxy integration. Using Proxidize with ixBrowser guarantees a safe and secure internet browsing experience.
What is ixBrowser?
ixBrowser is an antidetect browser with an excellent fingerprint masking technique. It can generate unlimited independent and unique digital fingerprints for your accounts, effectively preventing account association problems. ixBrowser performs well on iphey, pixelscan, BrowserScan, and other fingerprint detection websites, and has a very high pass rate.
Compared with other mainstream anti-detect browsers on the market, ixBrowser also has a higher price/performance ratio. ixBrowser has a free plan that allows users to create 10 profiles per day and there is no limit on the total number of profiles. If you want to create more profiles everyday or you want to unlock API and an advanced cloud storage function, you can purchase packages (plans) which start from $3.99/month.
In addition, ixBrowser has no team seat limit. Users can create a team, invite unlimited team members, and easily manage their permissions to make teamwork more efficient. ixBrowser also supports extension management, profile transfer, batch creation, batch modification, proxy sales, and many other functions.
How To Use Proxidize with ixBrowser
Using Proxidize with ixBrowser is simple. First off, download ixBrowser and create your account. After that is completed, create your profile.
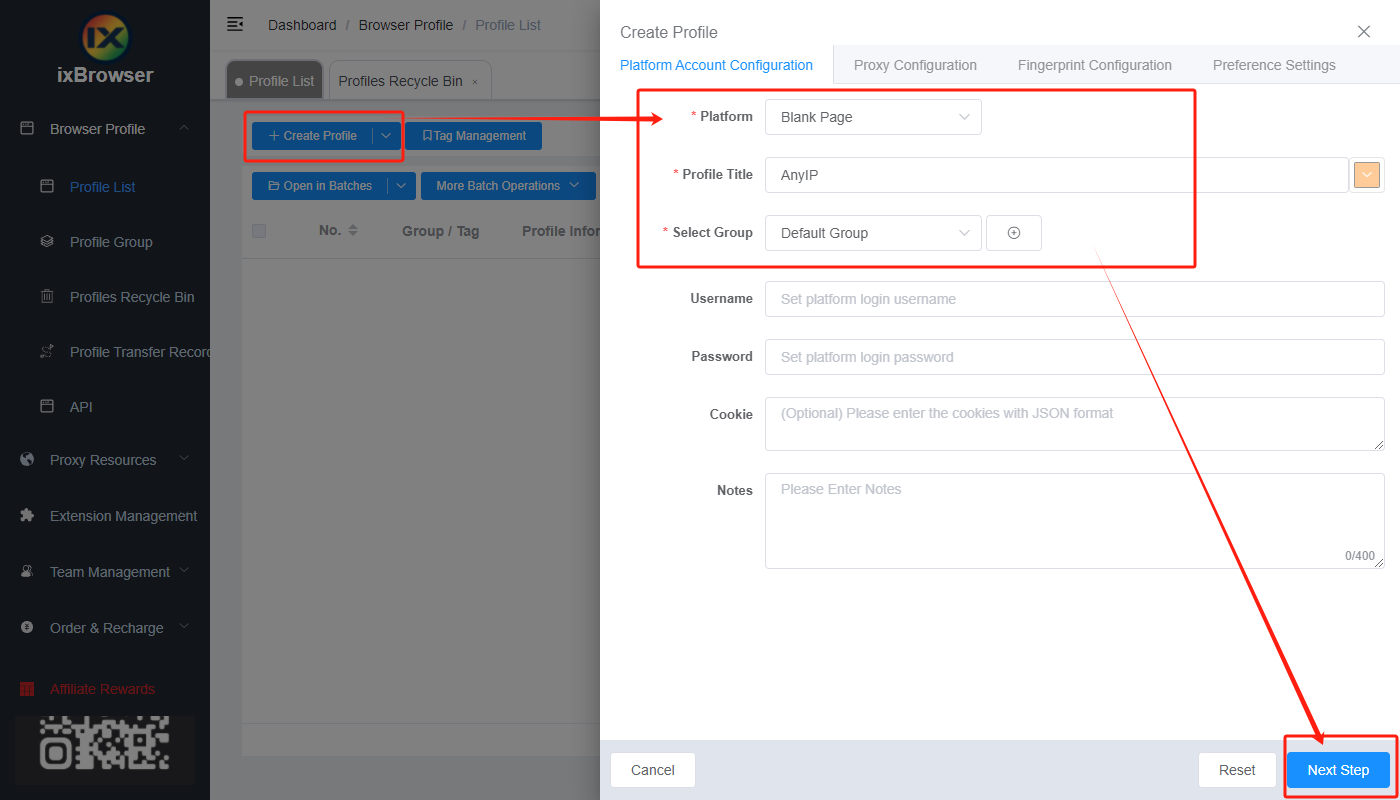
ixBrowser offers many customization options including the ability to choose the platform you wish the browser to use. They offer all the most popular e-commerce sites such as Amazon, Shopify, and AliExpress. You could also enter your own platform or leave it blank. ixBrowser allows you to group profiles together, making it easier to keep track of everything.
In the Proxy Configuration tab, you will find an option to choose a Custom Proxy and a button labeled “Proxy Referencing An Existing Profile”. Click on that and you will be greeted by a page giving you the option to input a proxy of your choice.
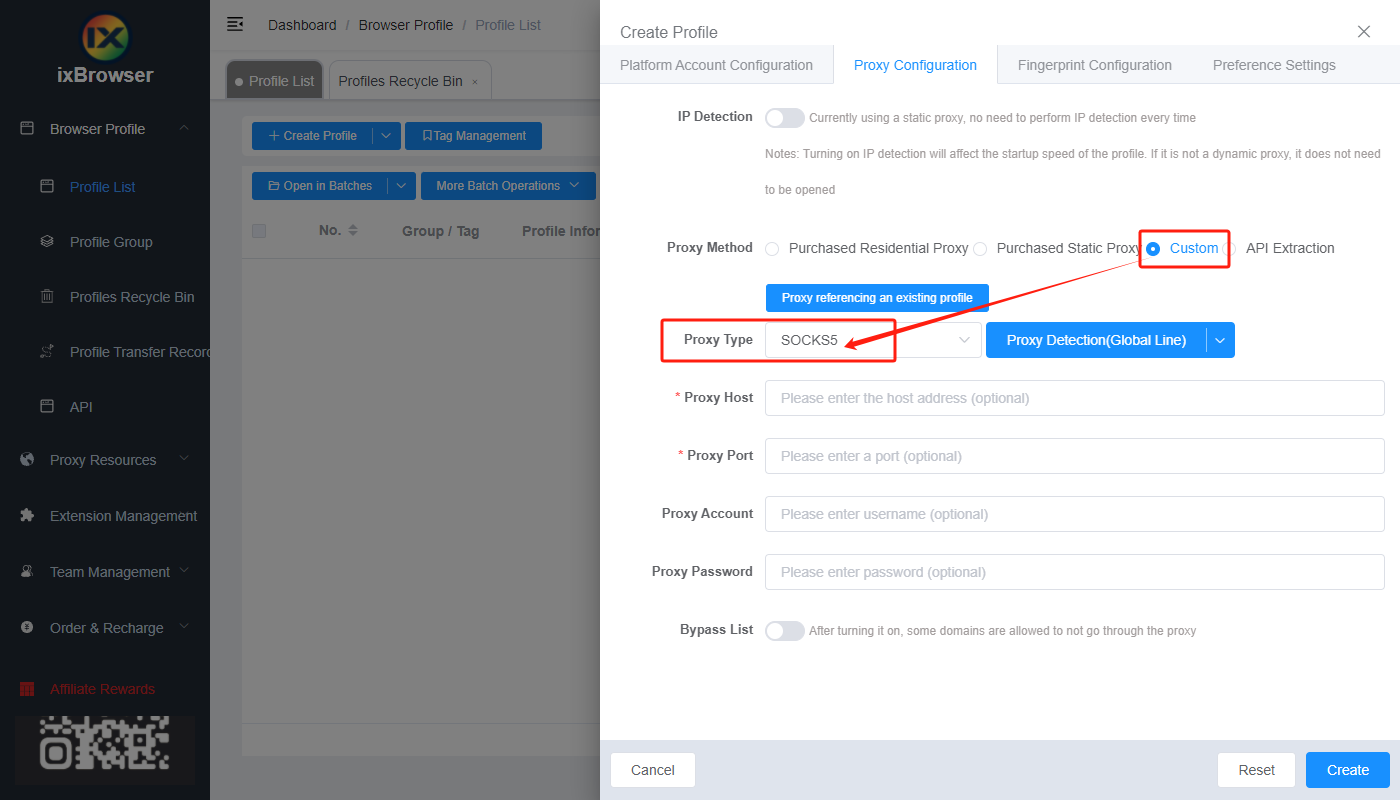
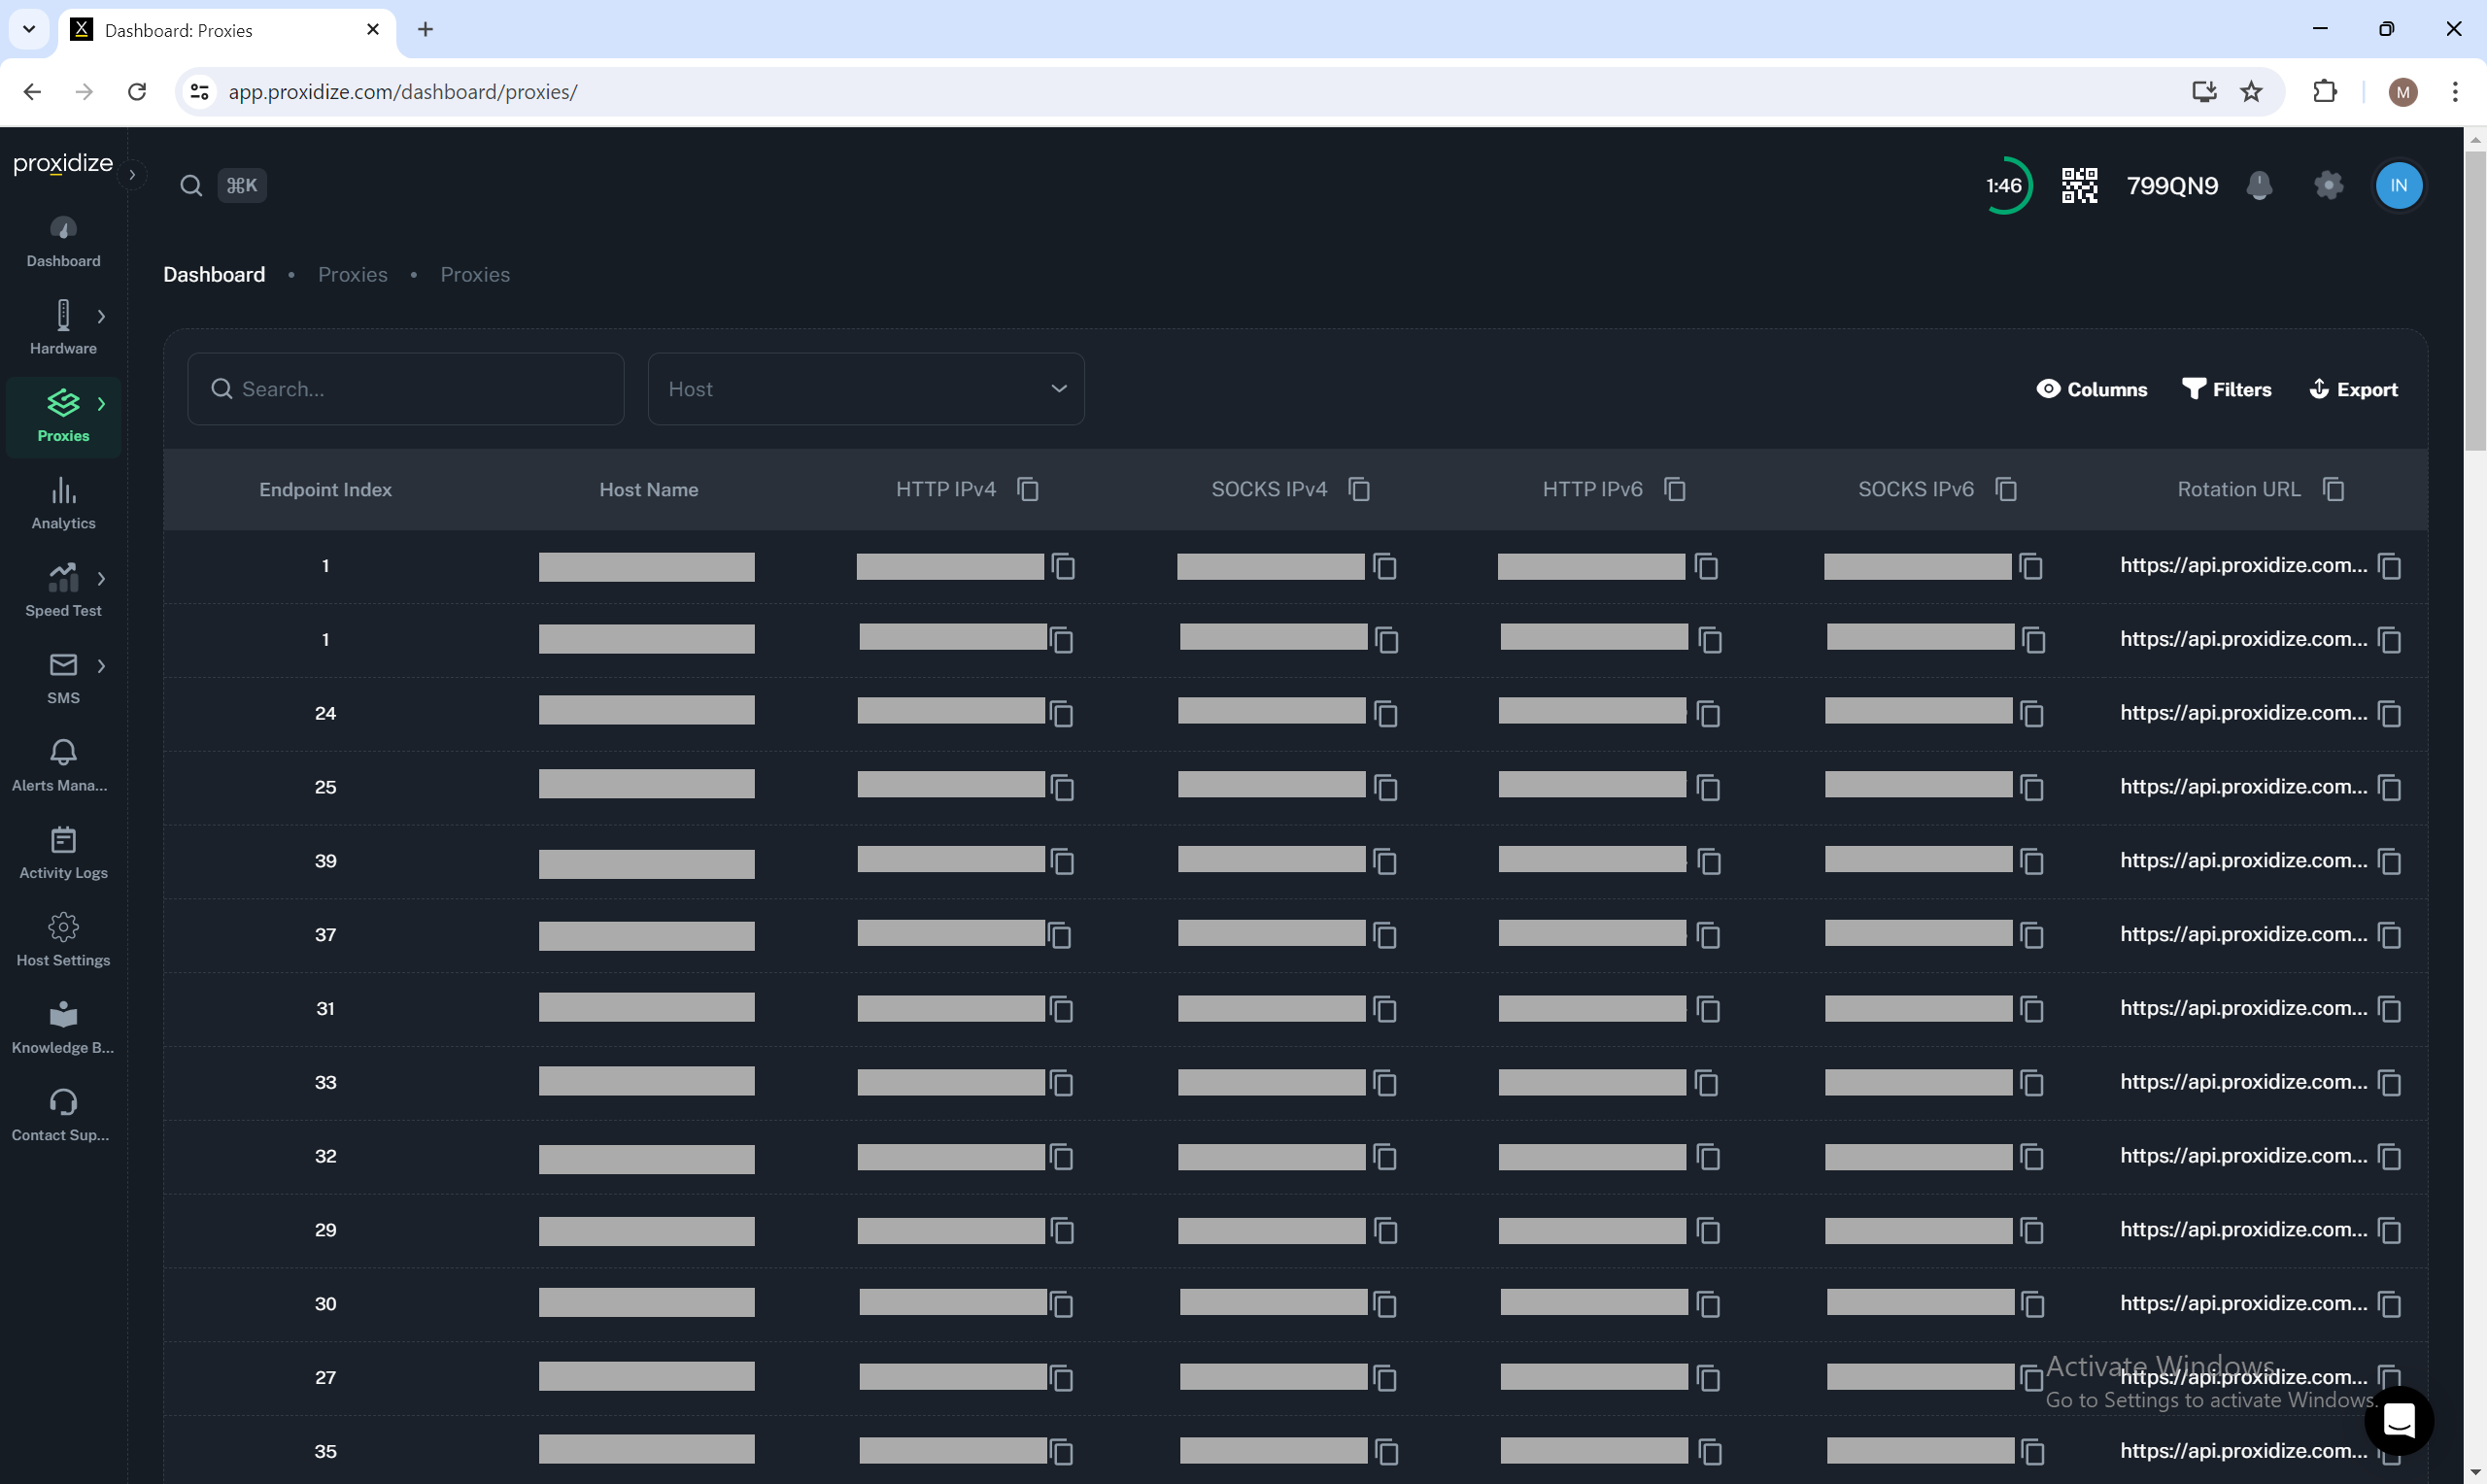
Once you reach this page, make your way over to the Proxidize dashboard where you can find a list of proxies to choose from. You can choose a SOCKS or HTTP IPv4 or IPv6 proxy. Simply click the clipboard logo next to the desired proxy type or copy and paste the proxy address onto the Proxy Host and Port destination in ixBrowser.
Additionally, ixBrowser offers the ability to check the strength of the proxy by clicking the “Proxy Detection” button available.
After all that is done, you could choose your customization options in relation to fingerprint tracking and general preference settings. Click confirm, and your account is ready to go.
Conclusion
This is the perfect time to test out both Proxidize and ixBrowser as Proxidize has recently offered a free plan of its services, allowing anyone to test out Proxidize by turning their Android device into a modem. Why wait? Try out ixBrowser with Proxidize today.